

Connect your agent
Connect Claude, Cursor, Copilot or any MCP client to your workspace.
Your agent connects to Skilder the same way it connects to any MCP server: over Streamable HTTP, secured by OAuth. Once connected, it discovers the skills and tools your roles unlock.
Before you start
- An agent client that speaks MCP: Claude, Cursor, Copilot Studio, or another MCP client.
Open Connections
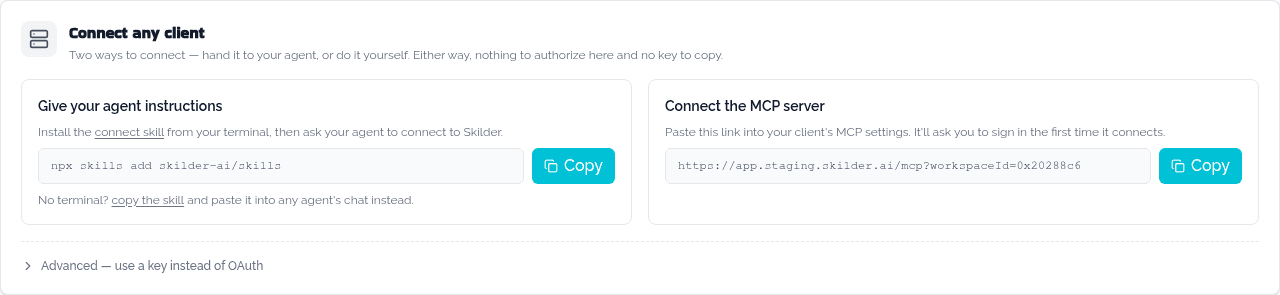
In the sidebar, click Connections under Agents. From Home, the Connect your agent card opens the same page. The Connect any client card at the top has everything you need.
Let your agent do it (fastest path)
If your agent runs in a terminal, click Copy under Give your agent instructions and paste the command into its chat:
npx skills add skilder-ai/skillsThe skill walks your agent through adding the link and signing in on its own. Prefer to add it by hand? Continue below.
Copy the connection link
Under Connect the MCP server, click Copy. This link is the same for every client and every user, and it doesn't carry a key.
Add it to your client
Paste the link into your client's MCP settings. Most clients call this "Add an MCP server" or "Add a connector." Claude Code takes it on the command line:
claude mcp add --transport http skilder <paste-the-link-you-copied>For Cursor, VS Code, ChatGPT and others, find the client's card under Set up a client for a link to its own docs.
Sign in
The first time your client uses the link, it opens a one-time browser sign-in to Skilder. Approve it, and pick the workspace to grant access to if you belong to more than one. There is nothing to authorize from inside Skilder itself.
Check it worked
Ask your agent:
What capabilities do you have available?It should list the skills and tools your roles unlock. The client also appears under Connected on the Connections page.
Next
- Test a role in Studio to try a role without leaving Skilder.